
5 Essential bottle photography tips for magazine worthy photos
The importance of product photography. If you have a brand, you want to showcase that brand is the best possible way. Visual images of that brand is what will help people see what you’re selling, understand it and give an insight into your brand identity. Especially when talking about brands who’s products are bottles.
Such in the case of beverage products. Below are my 5 essential tips for capturing mouth-watering, magazine worthy bottle photography.
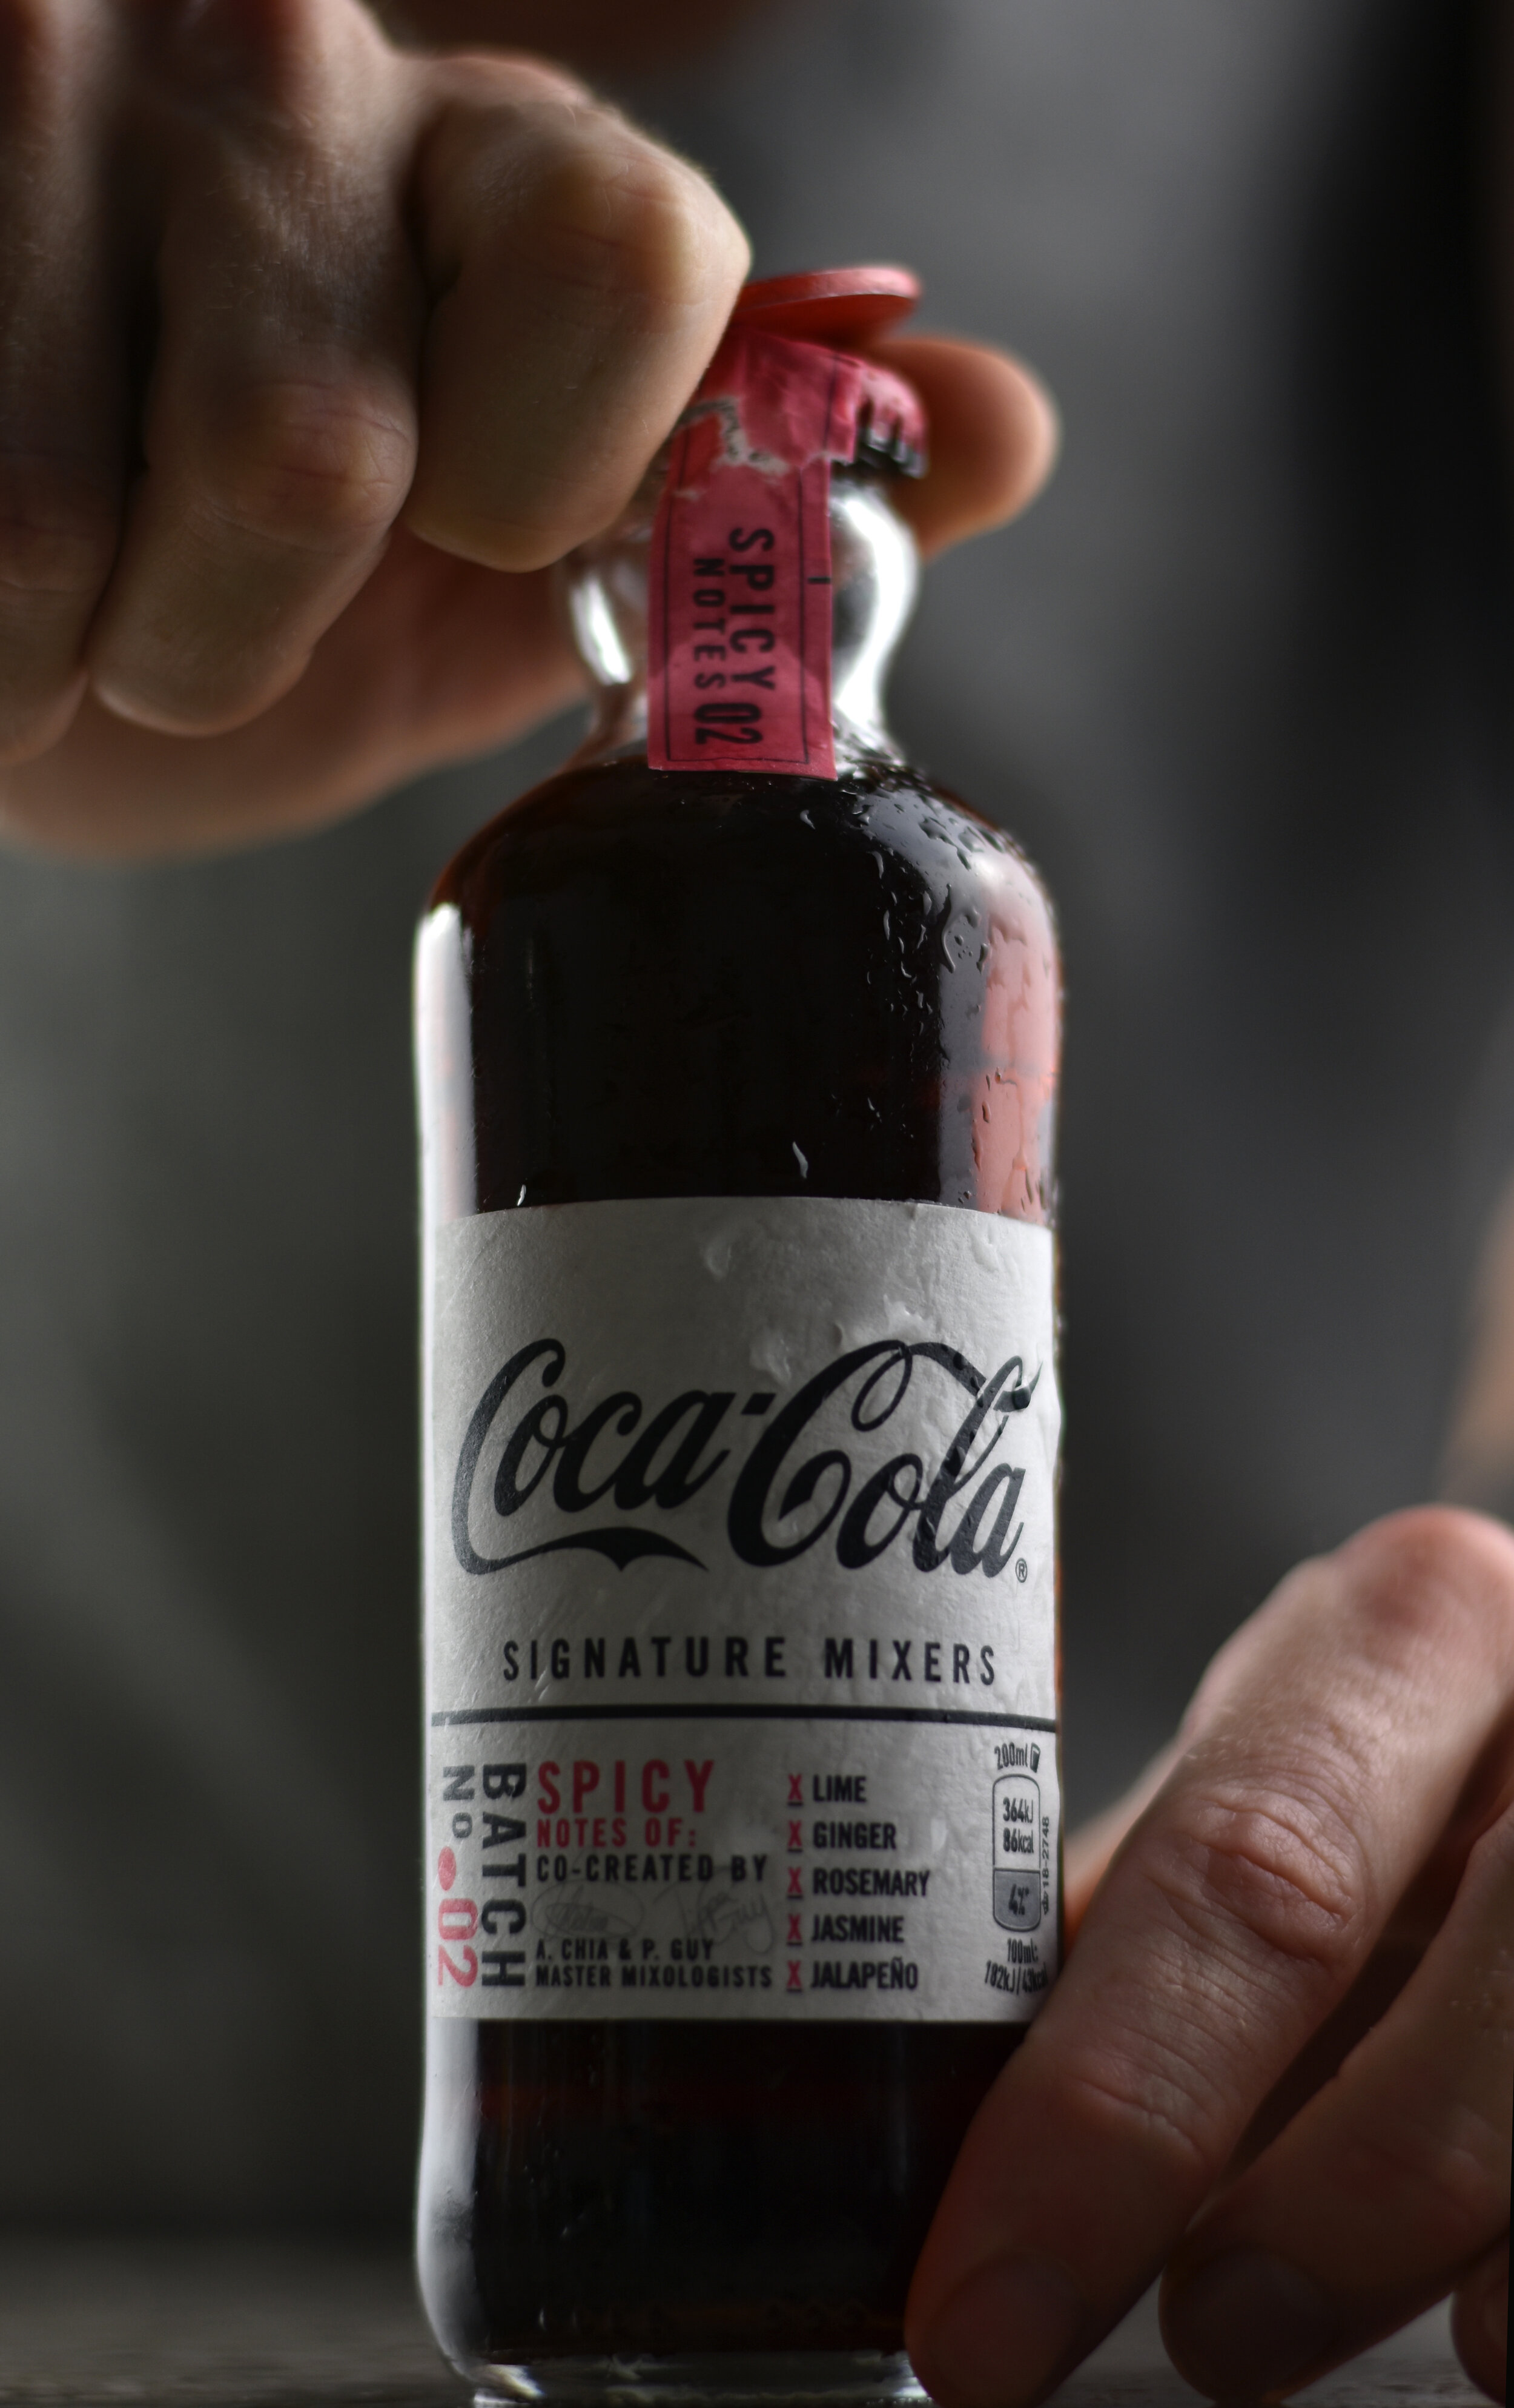
Coca-cola product photo shoot.
Bottles can be difficult to photograph. Working with glass, plastic, labels and different shaped bottles can affect the way we use light in photography. Without an understanding on how to work with a bottle. Product photography can get frustrating.
Whether it’s an energy drink you're selling, Wine, Spirits, Beer or cider. Having clear, high quality photos of your beverage will help you share your brand, not just in your online store, but also on social media and throughout your marketing.
Images shape a customers first impression, creating a tipping point as to whether they will continue browsing and eventually make a purchase, or look elsewhere.
Product photos aren’t just a testament to the quality of your product. They also allow people to have a better insight to what it is they’re getting.
Where would you need bottle product photography?
Everywhere from an Ecommerce store, your website, marketing campaigns and social media will require product photography.
Photos will and should be used for your full customer journey. From hearing about your product for the first time, whether that's through social media or your marketing, to buying your product.
Why good product photography is important
Photos are a key part of your customers purchasing decision. First impressions count and the key to making a good first impression, is impressive photos.
People respond well to visuals.
The hard part is already done, creating a product that tastes delicious, and looks appealing. Now all you need to do is capture that.
Presenting photos that are of high quality, reflecting your brand identity and showcasing your beverage product in its best possible light is critical.
The types of product photography.
Situation
Situation photos, also in-context photos are photos that showcase your product in some kind of situation.
This could be showing someone pouring your beverage, A cocktail or drink photo where your product is in the background or your bottle sitting on a table or in-front of an open fire for example. Basically, A situation where your bottle features. Or, your bottle in use.

Amarula product photo shoot.

Amarula cocktail photo shoot.

Amarula cocktail photo shoot.
This type of photography is great for creating a brand identity. If your brand is all about sustainability and well-being. Showing that by having a photo of your product in that sustainable and healthy environment will get that message across.
Whatever your brand identity may be, a photo will be the easiest way to showcase it.
If you are thinking about adding cocktail photography to your product photo shoot. A helpful resource is this guide to cocktail photography.
Blank background
With this style, we are talking about clean-cut, straight to the point. There's the product and nothing else in the frame. A blank black or white background putting emphasis on your product.
These are great for two main reasons. Firstly, its simple. Fitting two, four or fifty products on a page in this style will look cohesive. Everything looks neat, in-line with each other.
Secondly, it highlights your product perfectly. You can read the label and see exactly what it is. You're letting the photo speak for itself, saying “I don't need models or fancy locations to make you like this. I believe in the product enough to have it stand alone”

Food photography guide book.

The 5 essential bottle photography tips
With all that being said, how exactly do you achieve it? I’m glad you asked. Below are 5 tips that are essential for capturing mouth-watering, magazine worthy bottle photography.
Even if you don't utilize all these tips. Using at least one during your next beverage photography session will vastly improve your results.
Remove rear label
When it comes to bottle photography and something we will talk about more later, is the importance of back-lighting. The problem is, that bottles generally have a label on the back. A label with nutritional information, bar-codes and other things that we don't want peeking out in our photo. Secondly these labels block the back light from doing its job.
By removing the label we instantly create that commercial product photography look. Usually, a little soap and warm water will take these labels right off with no issue. Some bottles however, Might be more stubborn.
If this is the case, you can use the back of a spoon or knife to help tear the label of. Then soap and water to clean any of the adhesive glue from the bottle.
You can see the difference in the two photos below.

Back label peeking out.

Back label removed.
In some cases. You won’t be able to remove the rear label at all. It may be that its attached to the front label, full wrap around style. Or they have done a bloody good job at sticking it on.
In these situations you just have to deal with the rear label and be creative with your shots.
However, for the most part. You will be able to remove these labels with ease. Making your bottle product photography look massively more professional and aesthetically pleasing.
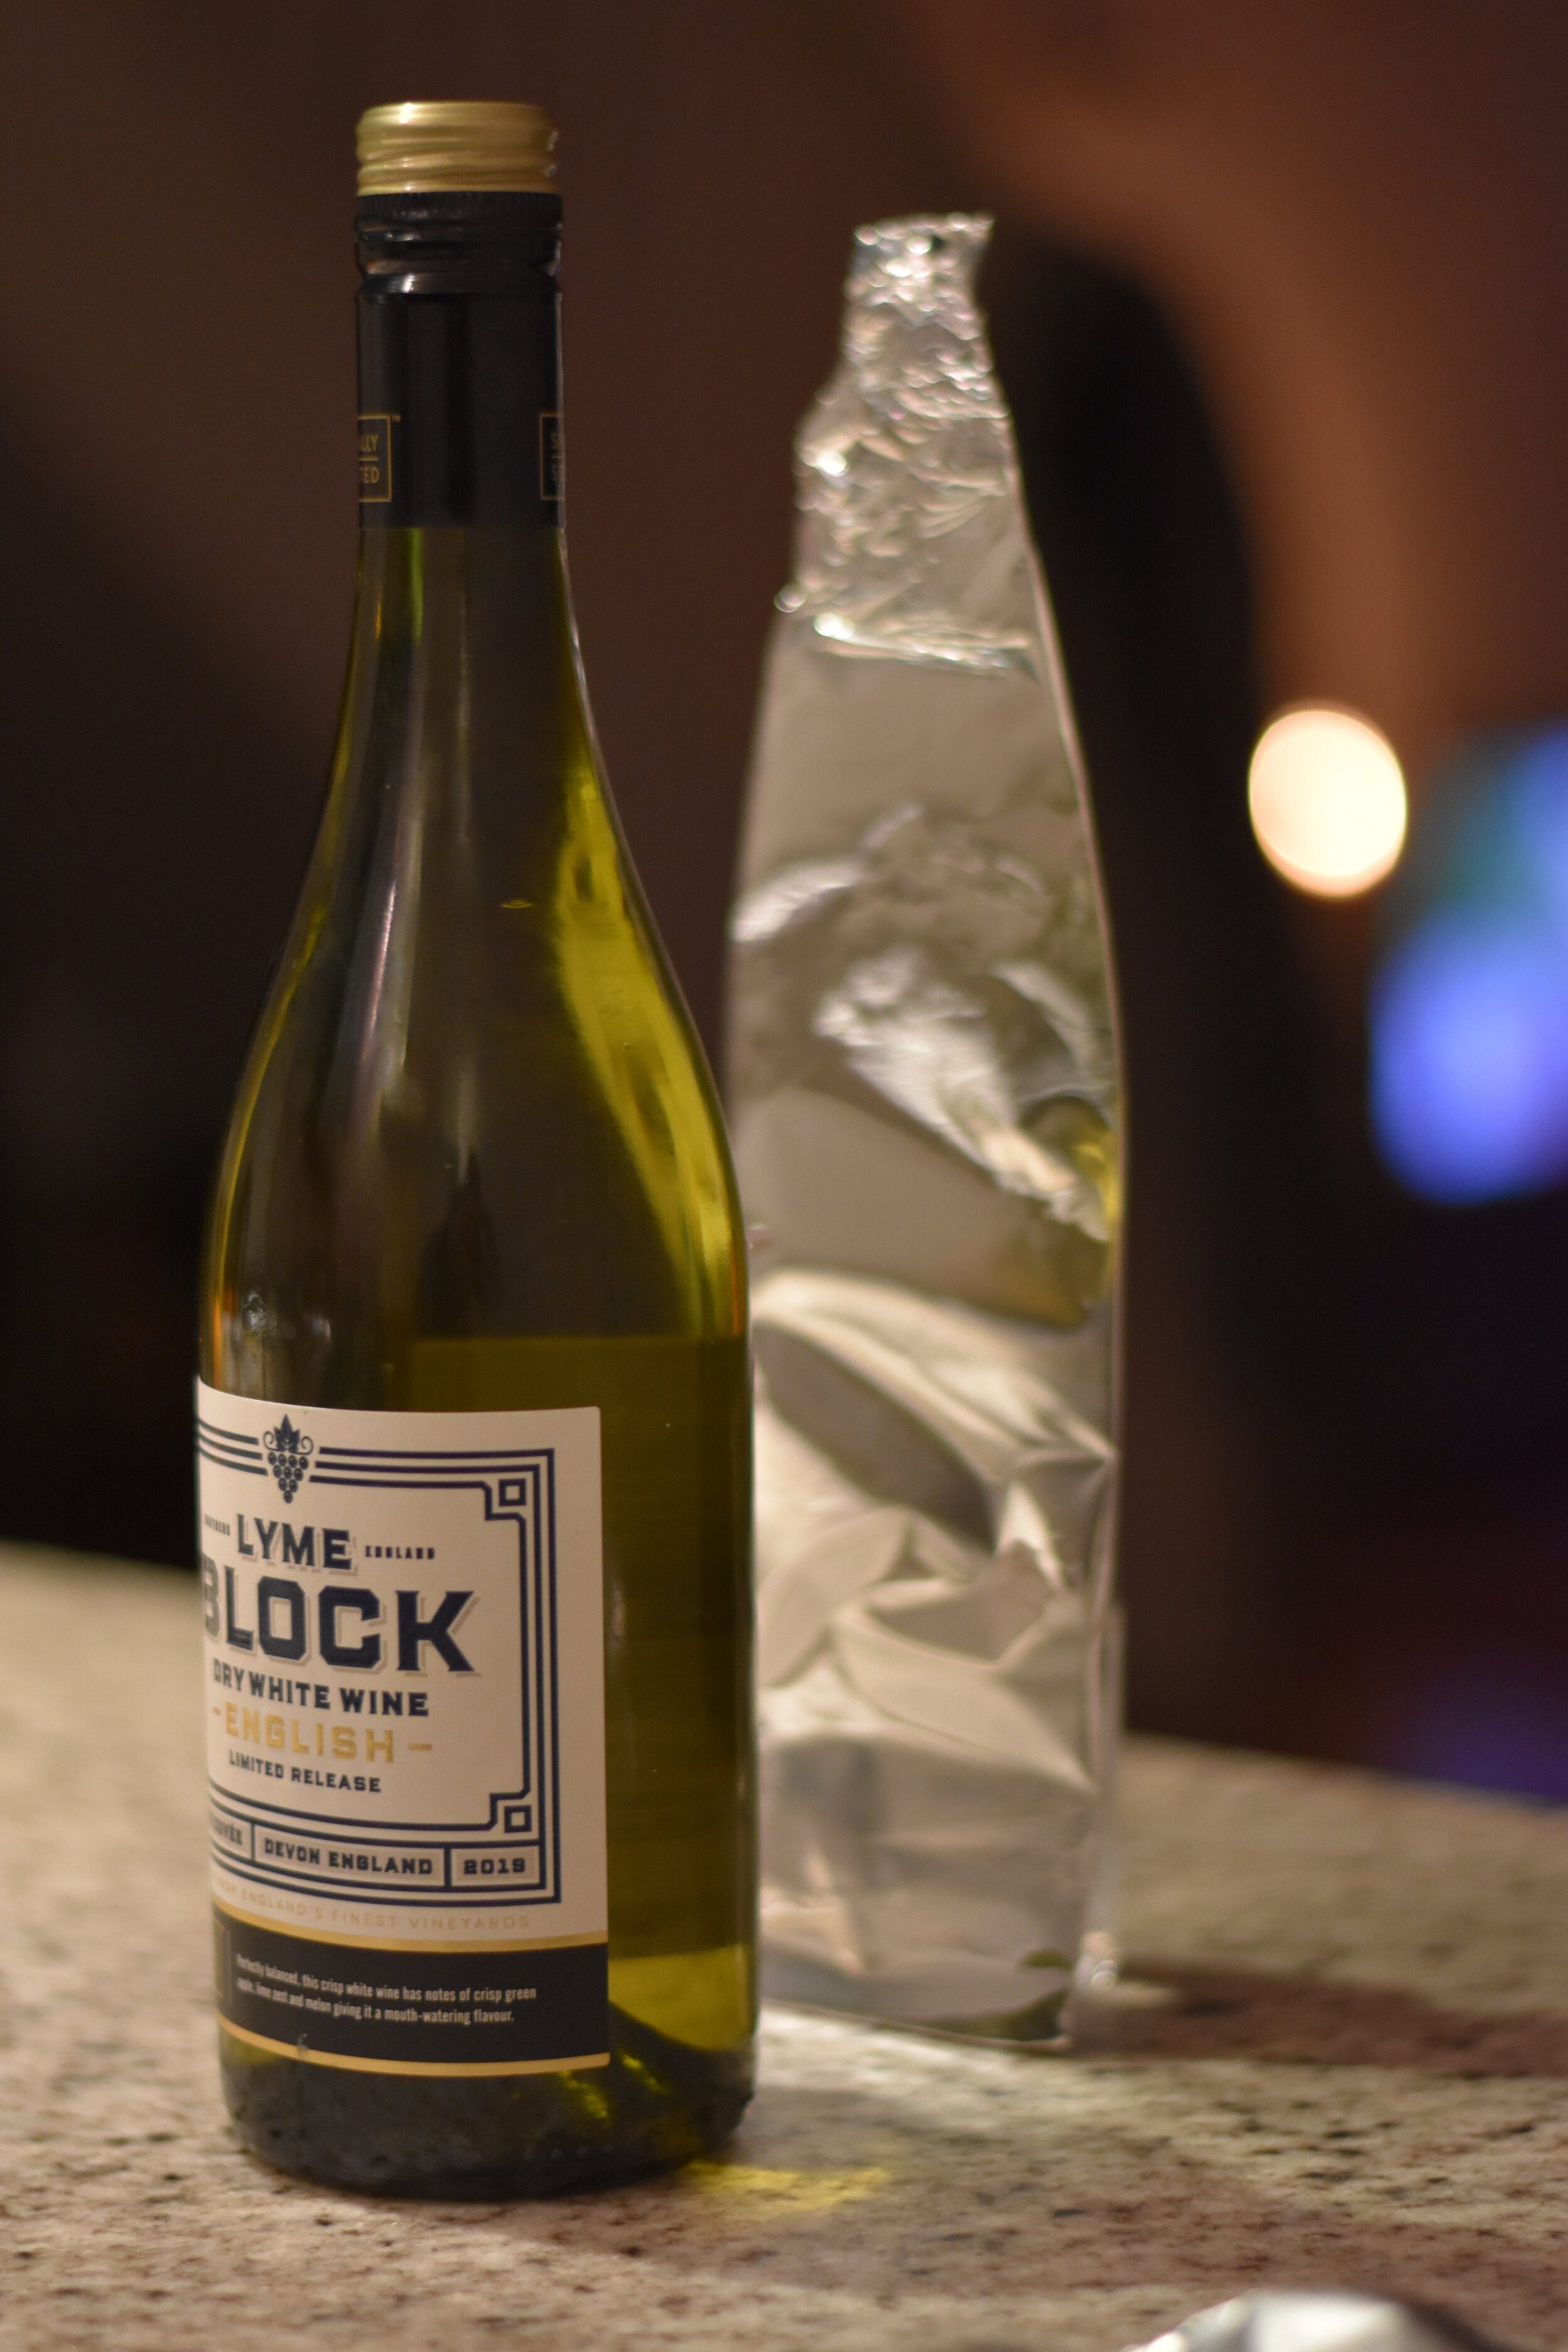
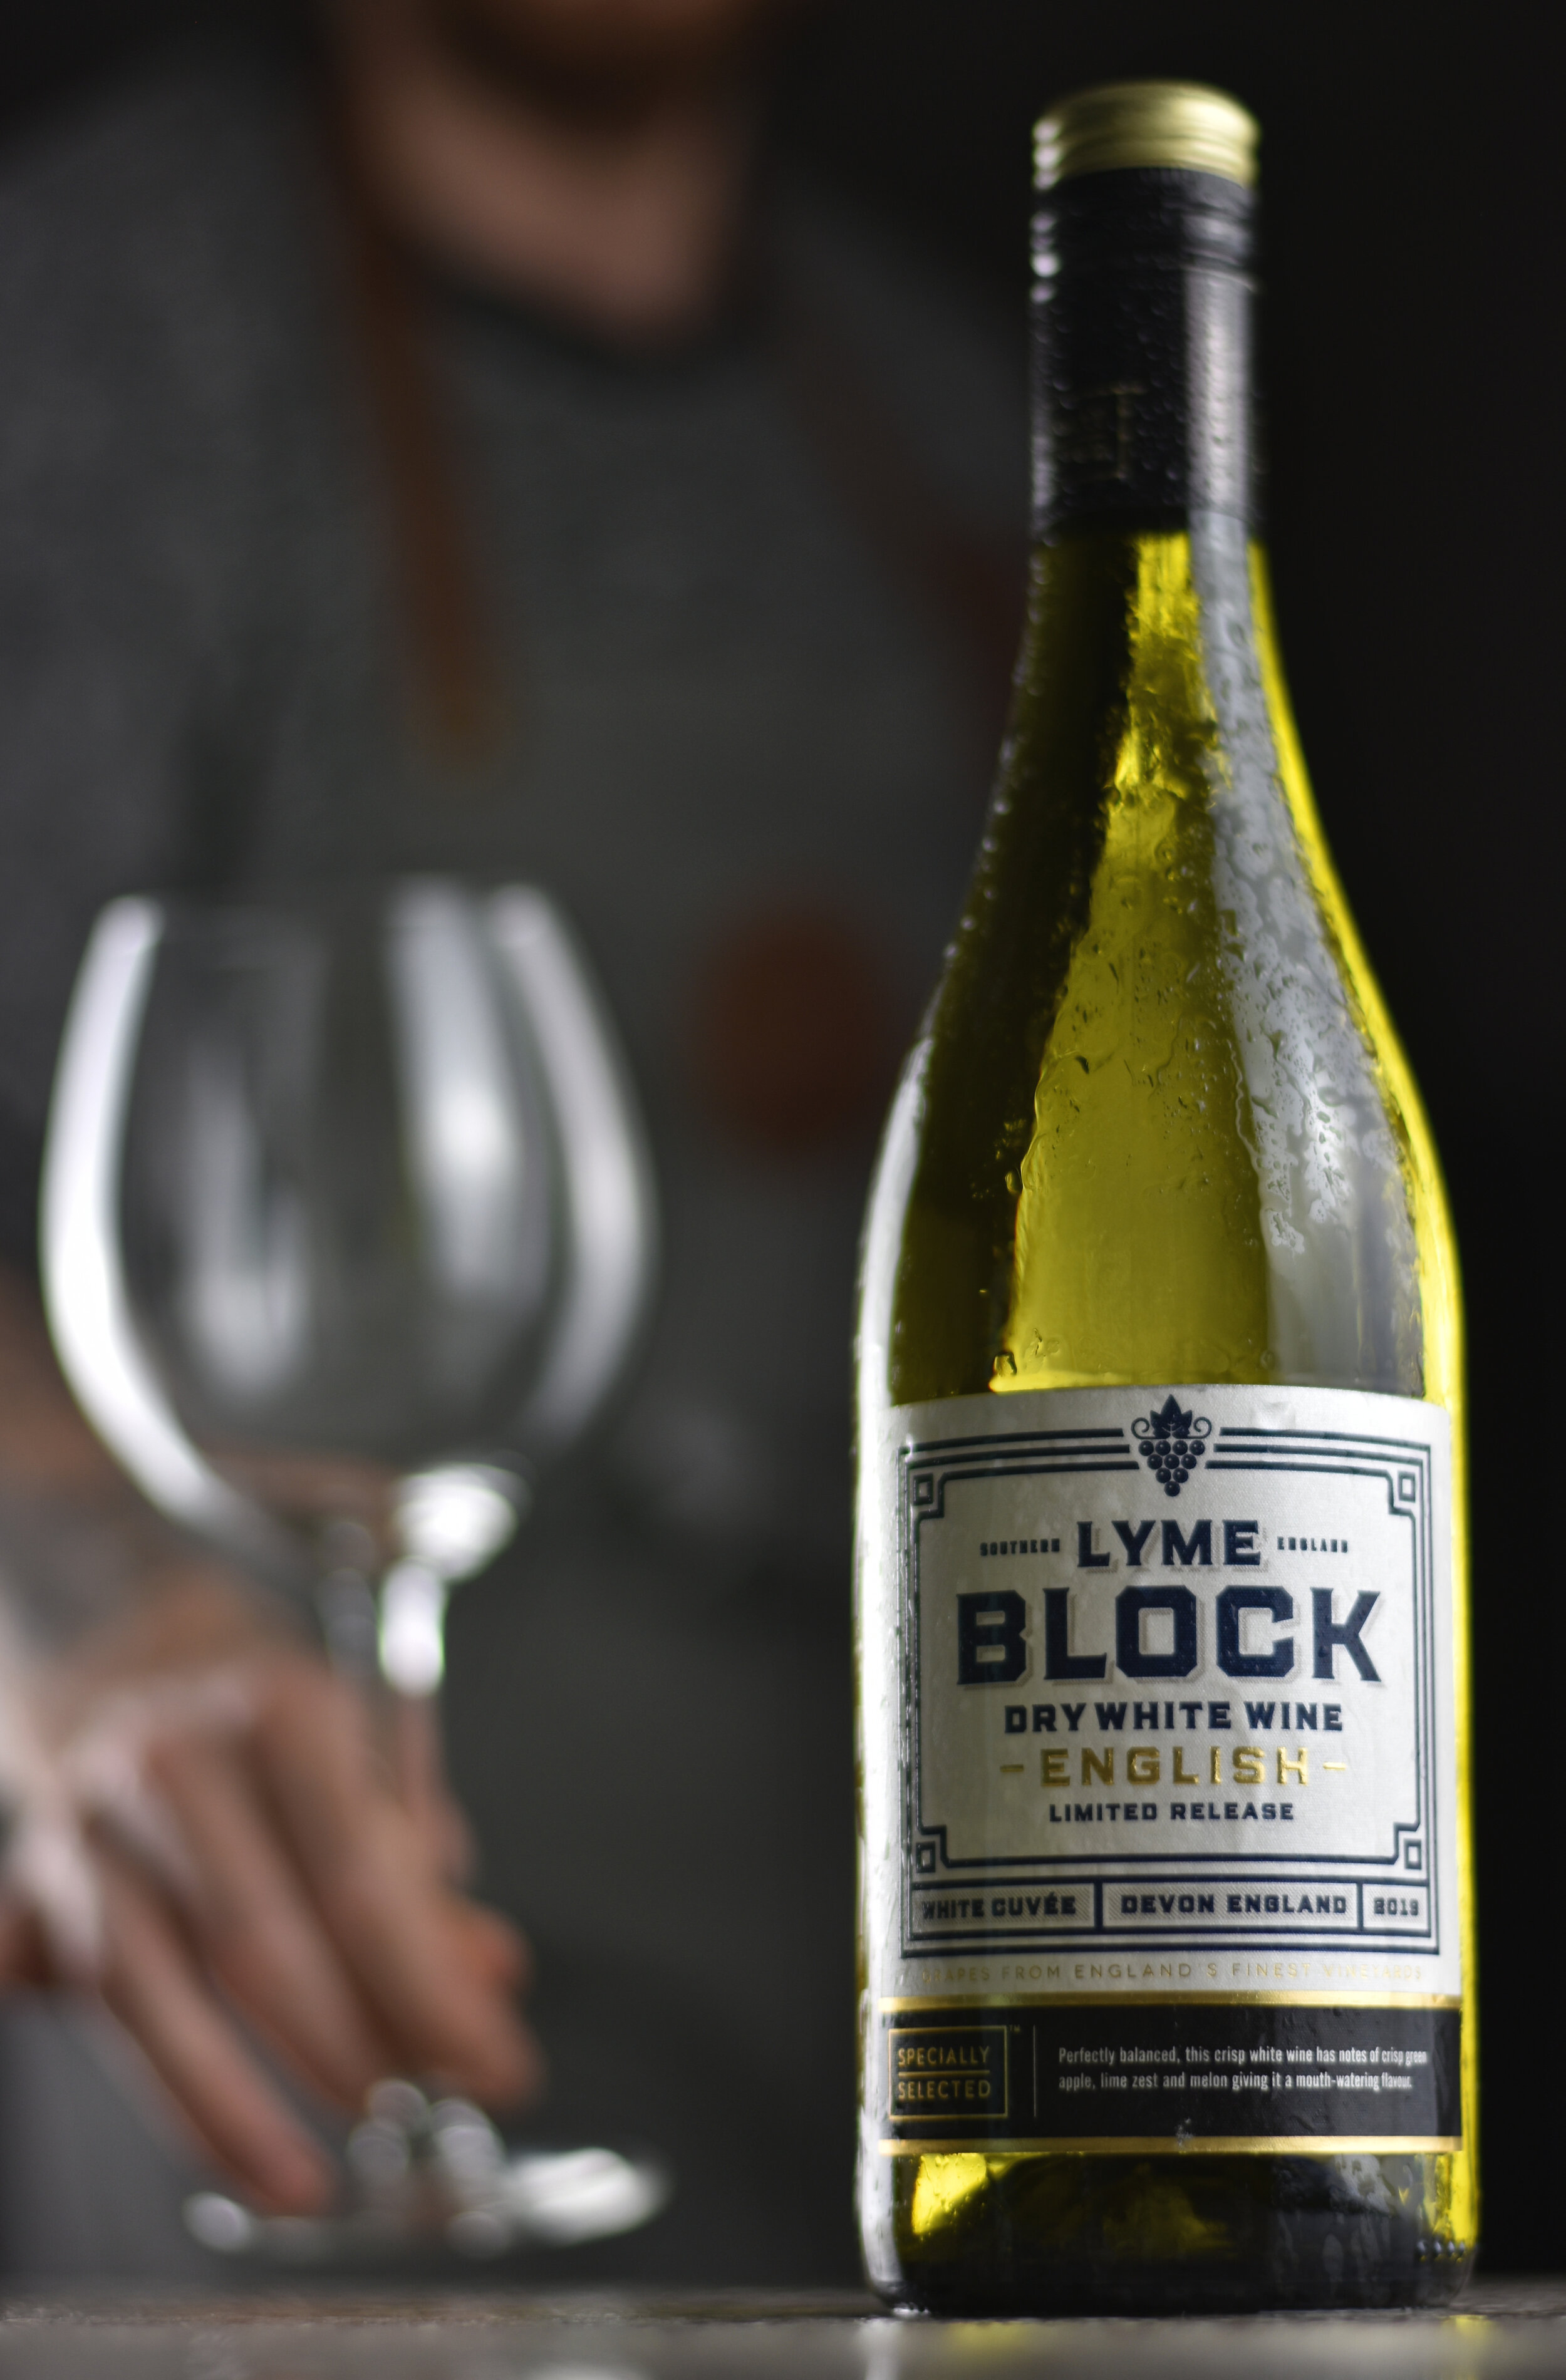
2. Chill effect
A lot of the time, bottle photography calls for some kind of “chill effect”. Making the bottle look cold. It makes a big difference in how appealing the photo is. A beer bottle that looks warm is unappealing, especially compared to a photo where the beer looks cold.
Your first thought may be to stick the bottle in a freezer or fridge prior to your photo shoot. But this causes inconsistencies and puts you on a strict time limit.
The ice cold effect you want may not always be achieved and as soon as your bottle is removed from the fridge, time is ticking down to the bottle warming up. Especially if you have warm lights pointing at it.
Luckily, There many ways to achieve that ice cold look on a bottle artificially, which are as follows:
Acrylic Spray Paint: This will give your glass or bottle some texture for that real condensation look
Syrup spray: Mix up hot water and sugar to a ratio of 1:1. That's 1 part sugar and 1 part water. Once the sugar has fully dissolved into the water, add the mixture to a spray bottle and allow to cool.
Once cooled, you can use this to spray over your bottle to add beads of water droplets, making your bottle or glass look ice cold.
If you were to just spray water on the bottle the water would drip right off. Having the sugary liquid makes the mix vicious so it sticks where you spray it.

Coca-cola signature product photo shoot with fake chill effect.
3. Lighting
Lighting a bottle for product photography is an artform in itself. Its the easiest thing to make your photos instantly look better. As for the best lighting for bottle photography, there are a few techniques for that professional look.
Back-lighting. Back-lighting is what's going to give the liquid in your bottle that illuminated look. As Well as casting a nice halo of light around your bottle.
Front-lighting. Front lighting can be more tricky. The aim is to light the label on the front of your bottle. Whilst trying not to diminish the light that we have from backlighting our bottle.
To achieve this, you want to use some kind of black card or paper to block out sections of your front light, leaving only a sliver of light shining on your label.
If you don’t have lighting equipment, don’t be discouraged. With some natural light from a window and clever placement, you will light your photo perfectly.

Wine bottle Side-lighting example for moody photography look.
Side-Lighting. Having a window light to the side of your bottle will light up the liquid inside, whilst also lighting the label. However, this will create shadows on the opposite side.
That’s not necessarily a problem. Personally, I like the shadowy look. I think it adds characters, it falls right into my photography style. See the above photo for an example of this.
However, if that look isn’t for you. Grab yourself something with a reflective surface. Such as a large piece of paper or cardboard wrapped in tin foil. This will reflect that window light onto the opposite side of your bottle diminishing the shadows.
Side lighting wraps your bottle in light to illuminate and outline it.

Side-lighting a wine bottle for product photography.
4. Reflector behind the bottle
Now for the arts and crafts section. What we need, is to create a small, bottle shaped reflector that we can place behind the bottle. This will be hidden from the end shot, but will reflect all the light throughout the bottle.
To do this, grab a piece of cardboard. Trace out the bottle shape and cut it out slightly smaller to make sure it's hidden behind the bottle.

DIY Bottle photography reflector.
Next, grab some tin foil. Tin foil will work as a mirror, taking all the light that hits it and reflecting it through the bottle. Wrap your tin foil around the cardboard cut out you’ve made.
Use something to prop your homemade reflector up with. I find the easiest way to do this is just to stick it to the back of something smaller and heavier. Making sure the reflector is as straight as possible.
DIY Reflector for bottle product photography in position.
Place your bottle in front of your reflector. You may have to play around with it a little till you find the perfect light. Moving it back and forth, maybe trimming more of the reflector off if it's showing up in your image. However, when you do hit that perfect spot. Your bottle will be flawlessly lit.
5. Editing
Editing your photos can get really frustrating. But at the same time, it’s really satisfying. It’s the part when you see all your hard work come together.
It’s difficult to tell you exactly how to edit your image, because different images have different editing needs. But there are a few tips i will give you to help you out;
Don’t over edit: A mistake people make a lot is over editing there photo. Sometimes, the small changes you make may not seem to make much of a difference. Which makes people more likely to over edit. Over edited photos look, well, over edited.
When you’re editing your photos you want the end result to look as natural and effortless as possible, you don’t want to show that your photo is edited. Even if you’re editing effects in, like a floating bottle suspended in mid air. It’s obvious that it has to be edited to achieve that effect, but you want it to look as natural as possible.
So, hold back on that contrast and saturation scale. Always have a unedited version of your photo that you can keep checking back to for reference. This will help you notice how the little changes you’ve made make a difference. As Well as show you the negative effects of over editing.
Multiple layers: When taking product photography. Especially when that product is a bottle. It seems like you need a lot of lights to achieve that perfectly lit look. A light lighting up the left side, one on the right side, One behind the bottle, one pointing at a label.
For most of us, having that many lights is unrealistic. It’s expensive and unnecessary. If you have a tripod there is an easier and cheaper way to assure you light your bottle perfectly.
What you do is this. Set up your camera on a tripod and make sure to keep it perfectly still. The use of a remote clicker will help you here, so you have no reason to touch your camera.
Focus on different parts of your frame. First focus on lighting the right side, take a photo and move your light to the right side. Take a photo and move onto the label.
Repeat this process till you are happy that you have a photo from each part of the frame. Now its time to edit them together. Upload all the photos as layers on your editing software. Use an eraser tool to remove the parts you don’t want from a photo to reveal other layers.
Edited English wine bottle photography. With chill effect and bottle reflector.
Work with Smartblend
With these tips you should be able to create stunning photos of your product and raise the quality of your brand. However, if you want to assure you get the best photos of your product as possible. You can hire a freelance photographer to do the job for you.
A freelance photographer who specialises in food and drink photography, will be able to take the shots of your beverage or bottle to the next level.
If you want to contact myself about working with your product on a freelance photography shoot, you can do so via my contact page.
You can also check out my portfolio for product photography here.
Edited English wine photography.
Bonus Tip
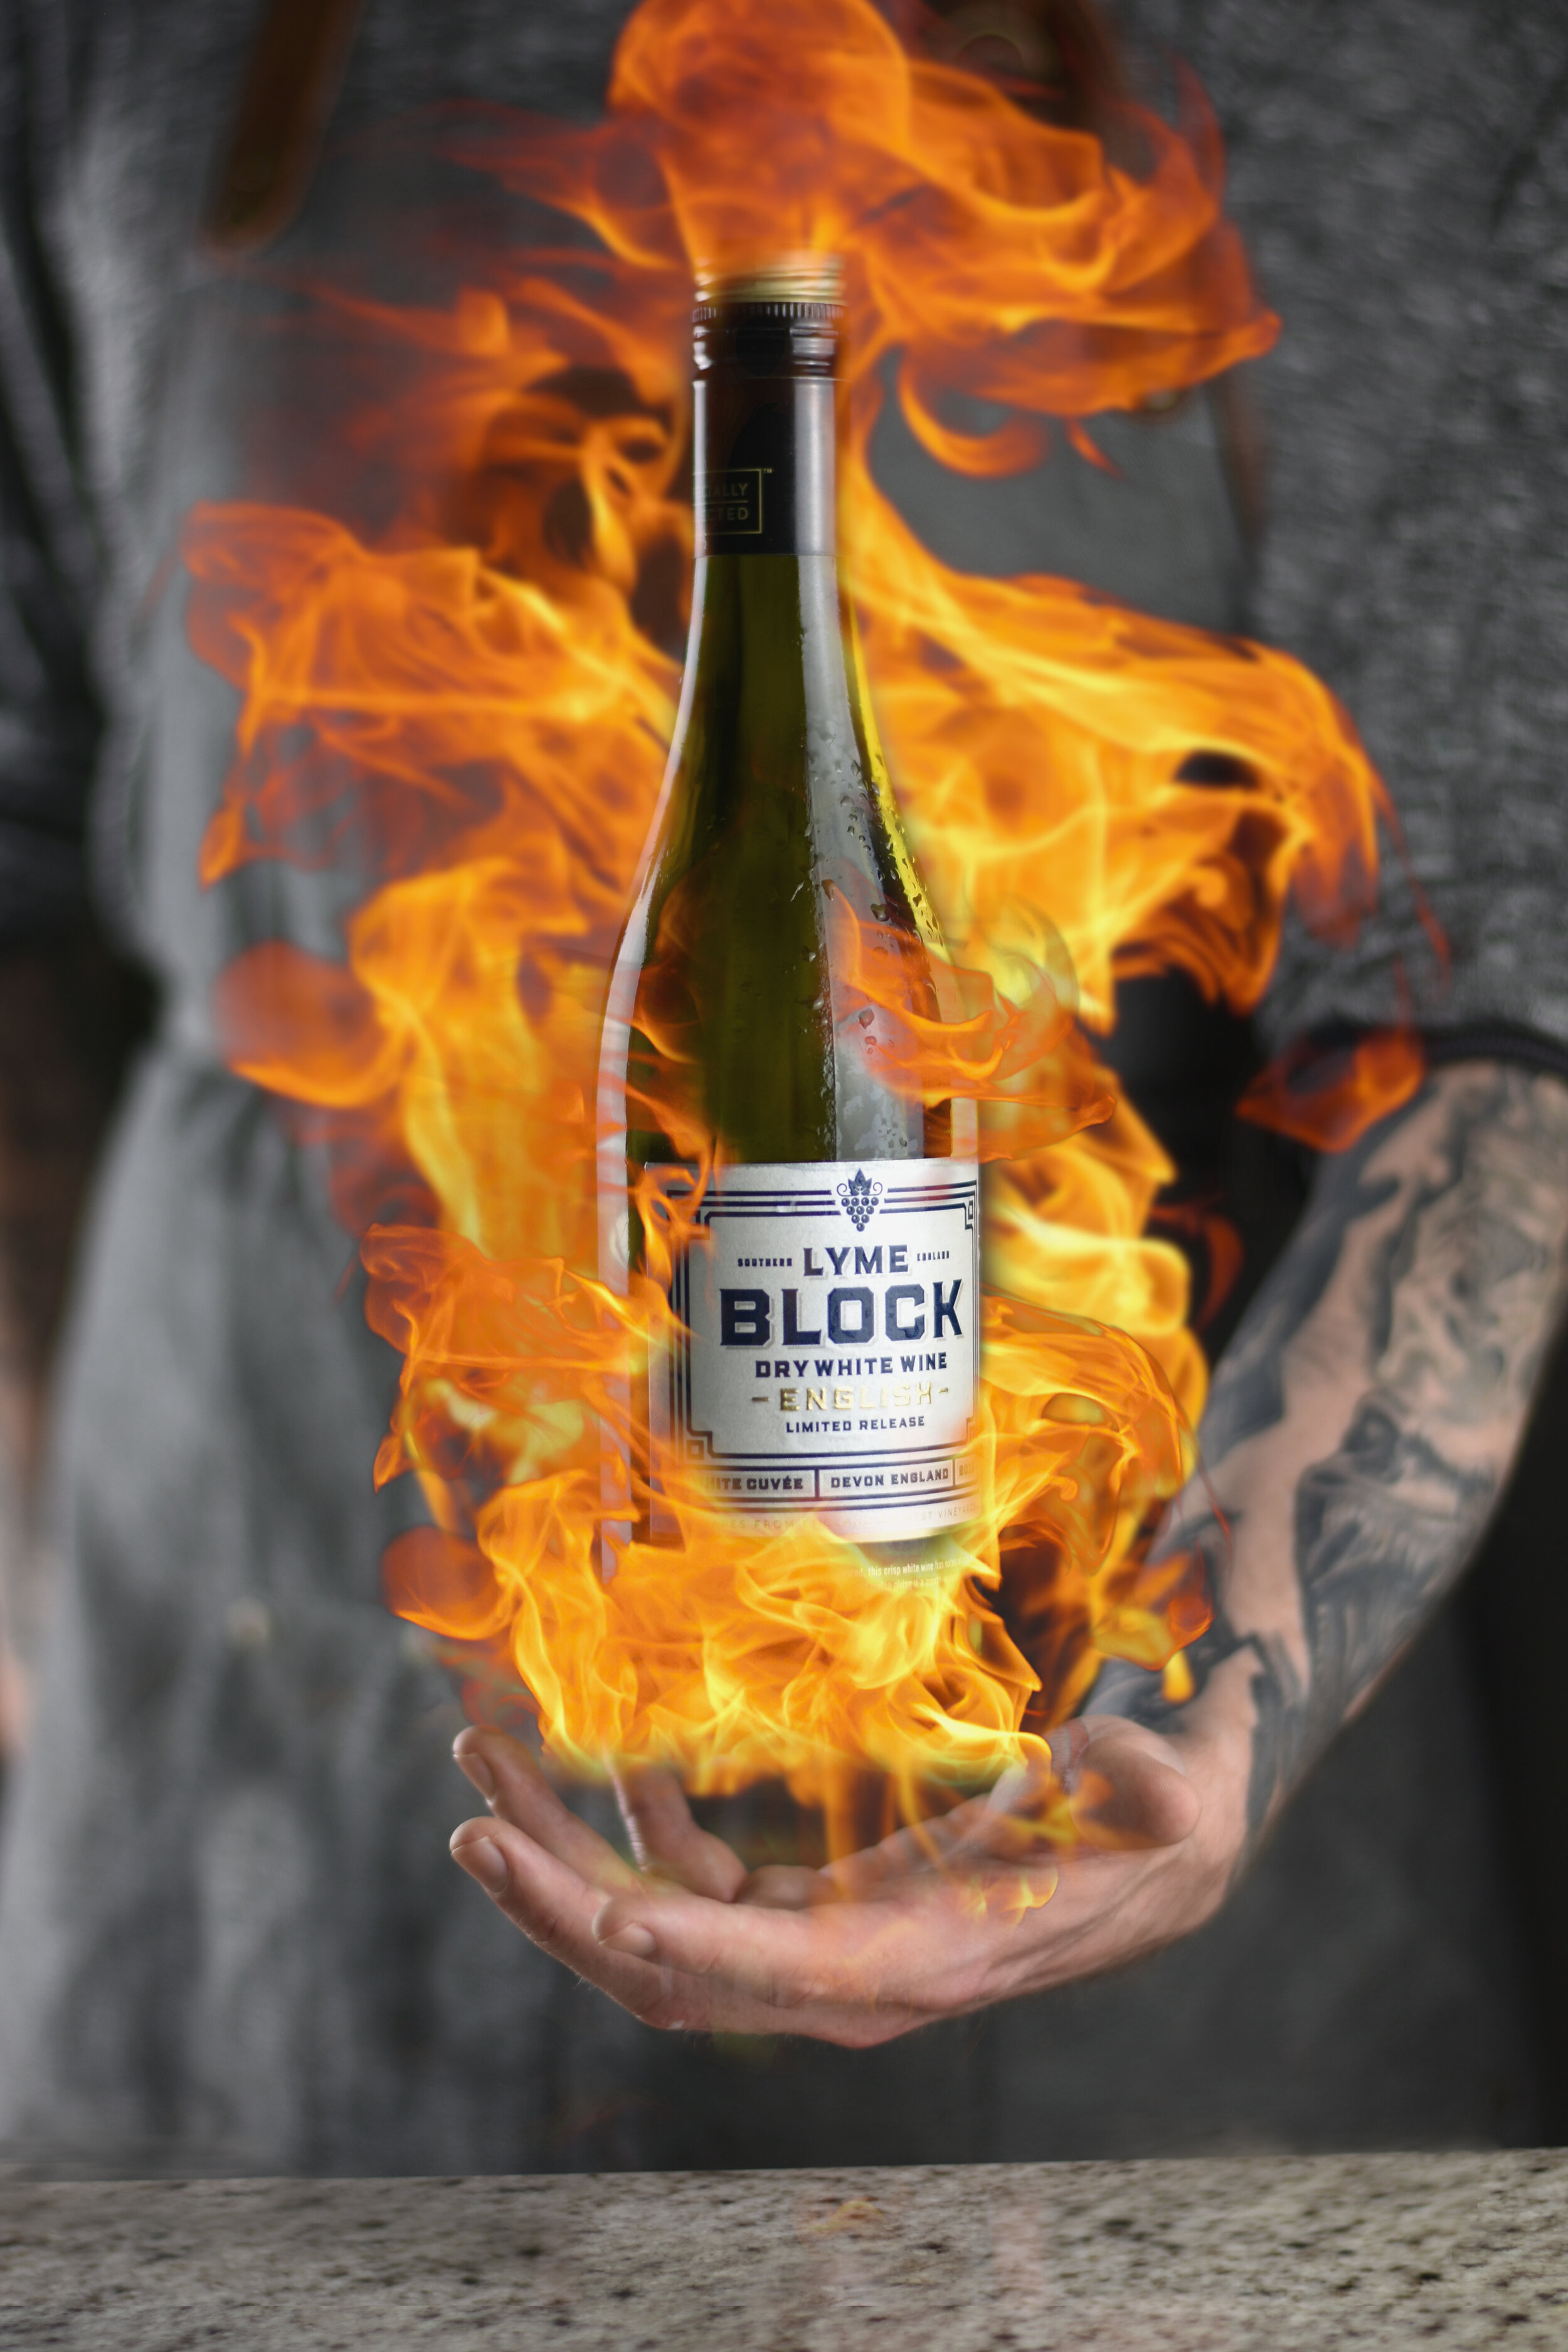
Don’t be afraid to get creative. At the end of the day, photography is an art form. That includes product photography. People respond well, engage more and remember creative photos more then regular unoriginal photos.
So, if you have a creative idea for a photo shoot, go for it. Don’t be discouraged if its something you haven’t seen before. In-fact, the fact you haven’t seen it before should be more of a reason to go for it.

Coca-cola product photography shoot - Suspended “balanced” bottle.
Smartblend is a participant in the Amazon Services LLC Associates Program, an affiliate advertising program designed to provide a means for sites to earn advertising fees by advertising and linking to amazon.co.uk