
7 Tips for better cocktail photography
The beauty of cocktails is the artistry and look behind them. Often you want to capture that look. But with cocktail photography it can be difficult. Photographing cocktails is hard because you’re fighting with a lot of tricky light.
Glassware and liquid are both things that can absorb and bounce light. Which can work out great for cocktail photography. However, a lot of the time it can make images look over exposed or blurry.
It can be frustrating. You have a beautiful cocktail which you want to photograph, but when you do the outcome looks, well, terrible. The photo looks nothing like how you see it from your eyes. It’s easy to consider the same photography techniques you may use for food. But what you’ve got to remember is, when using techniques such as lighting for food. It's about how the light falls on the subject and the shadows it casts. Whilst with beverages such as cocktails, it's more about how that light shines through the subject. Which is why I’ve but together these 7 tips and tricks for better cocktail photography.

I’ve taken a lot of cocktail photos in my time. And a lot of bad photos at that. I’ve been in situations where I wish i had these simple, yet really effective tips and tricks for better cocktail photography. Secrets of the cocktail photography trade if you will. So, with that being said. Below are 7 really simple tips and tricks that can be easily applied to your cocktail photography to vastly improve your photos.
I’ve been working in the drinks industry for years. Working in all types of Manchester bars and restaurants. So I've seen how cocktails look in photos from both a viewer prospective and a photographer prospective. There's lots of tricks and tips to taking better photos. But the seven below which i will talk about in this post, are the seven I’ve seen to be most effective in creating great cocktail photos. So whether your a professional cocktail photographer or cocktail photographer enthusiast. Looking to better your portfolio or just share your cocktails on Instagram. Check out my seven tips and hopefully they will help you as much as I’ve seen them help other people, including myself.


The 7 Tips for better cocktail photography
1) Clean glassware
Number one, is to make sure your glassware is clean. This seems like an obvious tip, but one that gets missed far too many times. If you’ve been touching the cocktail glass before shooting make sure you wipe it down first.
If you’re taking photos at home this is easily done by first polishing your glassware, then only handling it with a napkin or lint free cloth to avoid fingerprints on the glass. When you pour in your cocktail, make sure you use a funnel or jug so you firstly, don't need to touch the glass and secondly, don't spill any liquid.
If you’re shooting in a bar or restaurant. Chances are that even if you haven’t touched the glass, someone definitely has. Whether that's the bartender making the cocktail, or a waiter bringing you the cocktail. Someone would have touched that glass. So grab a napkin and polish the heck out of the glass prior to taking photos.
Even if you can't see any smudges on the glass. Still polish it. The reason is, you may not see any smudges on the glass, but once you set your lighting up and take some photos. When you’re going through these photos you’re going to notice fingerprints on the glass, exaggerated by the beams of light.
Also, polishing the glass regardless of smudges is going to help the light shine through your cocktail. Making them end photos look great.
2) Back lighting for cocktail photography
Lighting is easily one of the most important things for cocktail photography. For any photography for that matter. So, it's an important thing to consider.
When it comes to cocktail photography. Lighting can be a tricky one master. Working with glass and liquid can cause all types of frustrating lighting situations. Such as bright spots where you don’t want bright spots and reflections where you don't want reflections. The lighting that proves most effective is back lighting. And this doesn't always have to be smack bang behind the cocktail. It can be more to one side or another such as the image below.
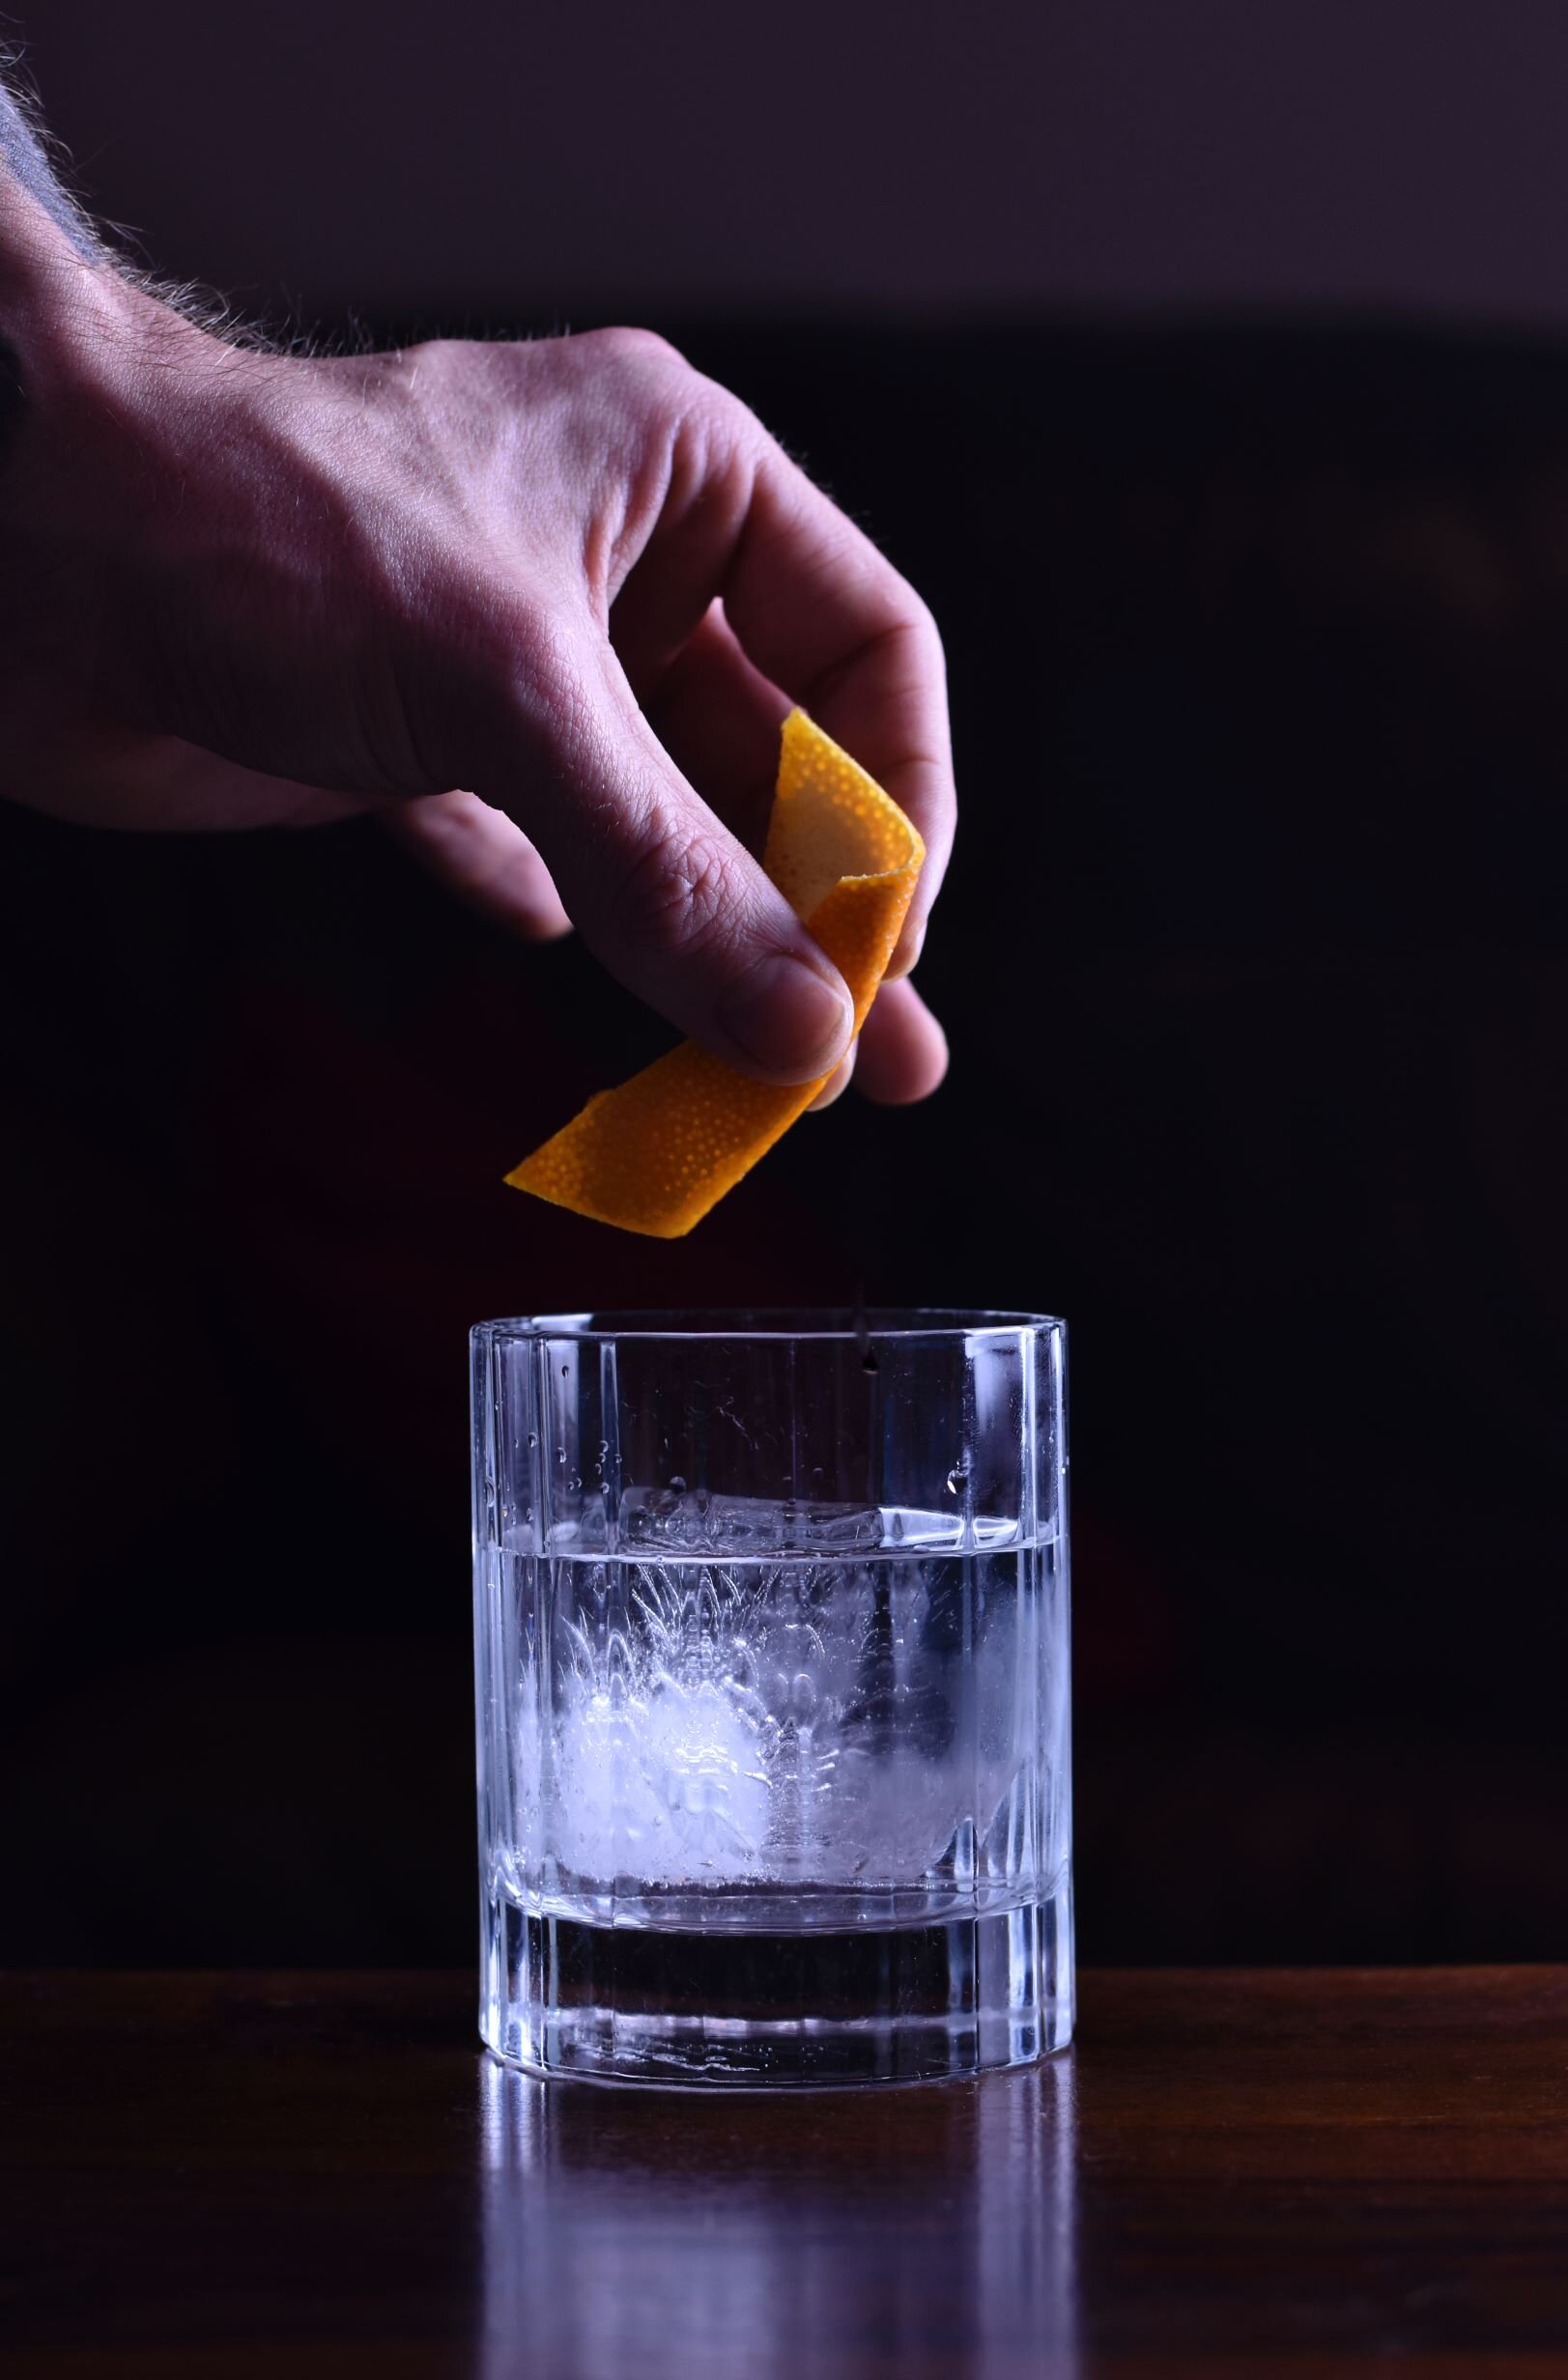
Light source behind the glass to the right side of the photo just out of frame. Lighting the glass and also creating shadows on the left side of the hand
Lighting can also be from above or below the cocktail. As long as the light is coming in from behind the cocktail, you’ll always get better cocktail photos.
The reason back lighting works wonders for cocktail photography is because of the way the light reacts with glassware and liquids. If you were to light a cocktail from the front, the light would shine through the glass from the front, creating an overexposed look.
The beauty with back lighting is it highlights the liquid inside the glass. It makes the liquid look brighter and more appetising. When working with glass it will shine through from behind the glass, the glass will then scatter the light like a reflector would, making the cocktail the focus point.

The whole background in this photo is artificial lighting, with a large diffuser in between the cocktail and the light.
One wonderful thing I like about back lighting glassware is that it creates a slight shadow around the edge of the glass. Accentuating the glass. Not only does this make the glass and what's in it the focus point, it gives it a sense of elegance.

In this photo, the lighting is far behind the glass and photo, coming in from the right side. To shine through the glass but dark out the bottle.
Natural light will also be your best bet for bettering your cocktail photography. So take note of where those windows are, having a window at the back of your cocktail will enhance the way the cocktail looks, making for the best shot. But, be aware of other windows around you. If there's a light source coming from directly in front of your cocktail, as well as behind. It can stifle the light. A good trick to help avoid this is by using a big piece of card or sheet beside where you’re pointing your camera to block out any unnecessary light. Doing this is a sure tip to better your cocktail photography.
3) Show your ingredients
Whether your cocktail photography is for a bar or restaurants website, your own Instagram or just to show friends or family. People want to know what's inside the cocktail. When they know it creates interest within the photo.
Having the ingredients that have been used in your cocktail used in the photo will hint at what's inside the drink. It also helps create the story of the image. A story is something you want to consider with your photography. Photos with a story are always going to be more interesting than just another photo. Showing your ingredients in the photo will help craft that story.

Carrot and pineapple mimosa. I wanted to highlight the carrot in the cocktail and emphasise the freshness and garden feel.
Another thing ingredients help with is composition. Composition is where everything in your photo is placed. Is your cocktail on the left side of the frame? The right? Or perhaps in the middle? That's composition. Composition is important for creating great photos. Having a photo of a cocktail, where the cocktail is smack bang in the middle of the shot with no garnish, no props or nothing can be very boring.
If you want to take better cocktail images you need to consider the composition, having scattered ingredients in your frame is a professional photographer's top trick to taking better photos. It’s easily done and will enhance the image.
4) Add a human element to your cocktail photography
Creating a story is something I always aim for with food and drink photography. Creating a story with your props or drinks will allow people to “read” your photos. It makes for a more interesting image, rather than just having a photo of a Mojito, you have a feeling of relaxation, a party feeling or a story of someone on holiday, sunbathing on white beaches. A story will always better your cocktail photography.

As we spoke about before, Scattered ingredients is a great way to craft a story with your photo. Another way is to add a human element. Adding a human element will immediately add some interest to your photo. Having a photo of something inanimate such as a cocktail has the tendency to look staged in a photo. And the truth is, staged is what we want, we don’t want to just snap a photo and go, we want to stage it. Make sure the glass is clean, the composition is perfect, the lighting is perfect. However, we don’t want it to look staged. Adding something with life. Such as a person, or hand has this funny effect where it suddenly makes an image look candid.

I absolutely love adding human elements to photos. Especially when it comes to food and drink photography. Any cocktail that looks boring can quickly become interesting with some human elements in the photo. Whether this is someone pouring a cocktail into a glass, drinking a cocktail or even just holding on to a cocktail. Adding that human element will add a sense of movement to your photo and lift your cocktail photography to the next level.
5) Use complimentary colours to make your photos pop
Complimentary colours are pleasing to the eye. Using props in your photo that are the same, or similar to your cocktail or garnish colours will enhance the overall photo you take.
Take the photo below. I’ve used a red chair in the background because it's the same colour as the cocktail. Even though the chair isn't the focus point and is out of focus in the image. It adds a pleasing feel to the photo.

Complimentary colours don't always mean the same colour either. Take the below photo here. The cocktail is white but I've used plants for a green look. The cocktail on it’s own is pretty boring looking. No garnish, a plain glass. Having white props could have added some extra interest to the photos. However green is a colour that compliments the white. I wanted to have a tropical feeling in this photo, green and plants does that.

6) Use the rule of odds
The rule of odds simply states that odd numbers in photos tend to look more pleasing than even numbers. Don’t question why. Just accept that using odd number will better your cocktail photography. So how can you use the rule of odds? You could have three or five of the same cocktails in the photos for a start. You could also have a cocktail surrounded by two props.
In the photo below, a recurring theme is the number 3. I have 3 of the same glassware, 3 hands, 3 different props (The gin, the garnish and the bottle) to showcase how you could use this rule of odds in your cocktail photography.

7) The secret of salt
This is more of an unorthodox tip to getting better beverage photos. Basically, salt reacts to liquid giving the impression of bubbles. It’s a trick used a lot when taking photos of beer. The difficulty with beer is the head is an important aspect of the beer. Without it, the beer looks flat.
A beer's head will disappear the longer you leave it. Normally within 2 minutes a thick head on a beer, if untouched, will have fully disappeared. This can be difficult when photographing because usually, you need longer than 2 minutes to take a good photo. You need to adjust the lighting, the composition and your camera's settings. You don't want to rush this. Adding a pinch of salt will create a head on a pint of beer that looks natural. It will also add bubbles in a drink.
Take the below photo of a glass of Prosecco. No Prosecco was used in these photos. To create the look of bubbles, before taking photos i would add a pinch of salt to make it look like there's bubbles in the flat liquid.

So there you have it. My 7 tips and tricks to taking better cocktail photos and to overall, better your cocktail photography. I hope they serve you well!
Cocktail photography can be tricky to master, but with those tips you will be well on your way. Above everything, practise makes perfect. So get out there and start taking cocktail photos. Try these tips and experiment with your own. See what works. Don't just settle on the first photo you take. Try different compositions, different lighting and different angles. You may be surprised with the results you get.
If you work for a bar, restaurant, food or beverage product, or are a food and drink writer and are looking for a professional freelance food and drink photographer. Based in Manchester with the availability to travel. You can contact me here to work with me or discuss projects.
Furthermore, you can check out more photography blog posts below


